Amish Science Experiment: Chocolate²
3April 4, 2010 by OSW
As I may have mentioned before, I was recently the lucky recipient of a bag of Amish Frienship Bread Starter. A happy, bubbly little yeast colony that came with lengthy, detailed instructions and compelled me to make bread every ten days.
Which is fine. I like bread. Really, who doesn’t like bread?
But there’s a catch. Not only are you compelled to make bread every 10 days, but you are also instructed to divide the yeasty goo into five parts every 10 days. One you bake, one you keep, and the other three you give away to friends with their very own copy of the instructions.
Problem: in this day and age, how many of us have more than three friends who would be willing to take on a pet yeast baggie? So after the first ten-day run, you’ve exhausted your supply of yeast-friendly recipients, and you’re left with a bag of needy microscopic beasts and no idea what to do with them.
The original instructions for Amish Friendship Bread include a recipe for a lovely cinnamony sugary concoction. One of the main ingredients is instant vanilla pudding mix.
Because the Amish? Very impatient people when it comes to pudding. They’ll tend a yeast colony for the bread, but pudding? So not waiting around all day for that. Instant mix all the way!
Anyway, so there I was, Day 10. With a baggie of starter just ready to ‘splode and nobody around who would forgive me for giving them a portion of it. So I decided to get creative.
Amish Friendship Bread: Chocolate²
(to prep the starter)
1 baggie of Day 10 amish friendship bread starter
1 1/2 cup flour, 1 1/2 cup milk, 1 1/2 cup sugar
(for the chocolatey goodness)
2 cups of divided starter
6 eggs
1 cup milk
1 cup butter, melted (aka – 2 sticks)
2 cups sugar
2 tsps vanilla
4 cups flour
4 tsp baking soda
1 tsp salt
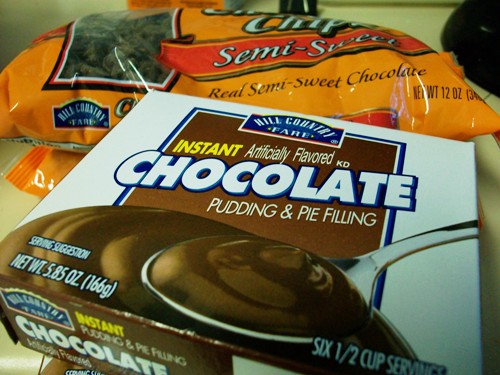
2 large boxes of instant chocolate pudding
1 1/2 cups chocolate chips
powdered sugar to taste
Okay, so it’s a great big recipe. It makes alot …. alot … of chocolatey muffiny goodness. But there’s all this starter to use up, and won’t nobody turn down a chocolate muffin. Take ’em to work with you and be amazed when they disappear in minutes.
Right, so here we are on Day 10 of your Amish escapade, and you have a gallon-size ziploc baggie full of merrily fermenting starter. Before we can even get started on the chocolatey goodness, we have to prep and divide the starter. So, it gets dumped out into a bowl.
Not just any bowl, mind you. For reasons unexplained, the instructions that come with the starter are very specific – absolutely no metal bowls or utensils are to be used during this process.
This seems lik a minor point now, but oh just you wait.
Anyway, dump the glop out into a non-metal bowl and add a cup-an’-a-half each of milk, sugar, and flour.

Forgive the bad lighting. Most of my baking happens early in the AM, before the rest of my brood awakens. Also, before the sun.
Mix it all together. Cuss because you don’t have a non-metallic whisk.
Now, in the normal course of divvying up this yeast colony, you would scoop out four cups, dumping one cup each into separate gallon-size ziploc baggies. Then you’d bake with whatever’s left in the bowl, keep one baggie for yourself, and alienate a few friends with the others.
But we’re rockin’ the boat, here. And we’re making a small army of chocolate muffins. So. Only scoop out three cups’ worth of the starter mix into baggies. Set those baggies aside to worry about some other day. You should have roughly two cups of yeasty goo left in the bowl.
To this, you will add a boatload of ingredients (so I hope your non-metallic bowl is really frakkin’ big). You will not photograph the majority of these ingredients, preferring instead to focus on what makes you happiest.
Then comes the stirring. Turns out it’s hard to break up clumps of flour with just a rubber spatula to stir with. And if you’ve got carpal tunnel, you’ll cuss. Alot.
Nine years later, the unholy mess finally comes together in a cohesive batter/dough substance. And there is much rejoicing. (yay)
The finished product is going to be pretty goshdarn yummy, so I recommend imposing some built-in portion control. This is easily achieved through muffinization. Which is a word.
See how full those are? Don’t fill ’em up that high unless you want some pretty epic muffin-tops. If you’re into that sort of thing, by all means carry on. I’m not here to stop you.
Anyway, bake these little darlings at 325 degrees for about 30 minutes. It’s an odd baking temp, but it’s what my instructions said, so I went with it. The results are awful pretty.
Just in case these aren’t decadent enough for you as they stand, being ready to burst with buttery sugary chocolatey richness, you should grab ahold of the grocery store’s greatest innovation:

Because some of us can't be trusted to have large quantities of the main ingredient for icing in the house.
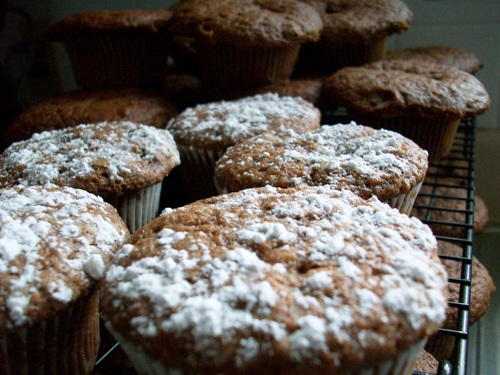
Shake-a shake-a shake-a that powdered sugar over the tops of your creations. Before and after baking. Because at this point, why the heck not?
Once they’re cooled, it’s all over but the snarfing.
In keeping with the spirit of (presumably Amish) sharing that the yeasty starter brings, this recipe yields about a bajillion muffins. Perfect for sharing with friends, family, coworkers, panhandlers on streetcorners, etc!
Warm, soft, fluffy chocolate muffins, studded throughout with gooey chocolate chips. Topped with powdered sugar.
Yes, this is exactly what the Amish had in mind.


I also made chocolate years ago but only used 1 instant chocolate pudding and some mini chocolate chips,awesome yumminess. My gifter recipe said you could use any flavor of pudding…how about pistachio?
[…] result of following the exact instructions for making your Amish Friendship Bread. One alternative deals with the starter at Day 10. But then what do you do with all the little baggies you have left […]
Hey fellow chocoholic:
These look positively decadent, but yummy all the more. Just a tip or hint, if you will, to make your life a bit easier and your friends more willing to answer the door when you come calling. And you can call bag-less. Guess what?
You can freeze the starter, for as long as you want and you’ll have starter when you want it, for a long as you want it. Years even, so relax and enjoy. Oh, by the way, it doesn’t really freeze, it just gets stiffer and the fermentation stops. It stops till you take it out and that becomes day 1. Do your 10 day thing and either use it all to bake with or freeze it for later use in a year or two. Now how’s that for convenience? And if you don’t want to do the 10 day thing, just take out a bag or two, let it come to room temperature and just bake with it. And as long as you’ve kept a bag back for starter, no worries, you’re home free.